Installing Heroku
Heroku is an excellent cloud service to deploy your Rails application. It provides the database server for your application and is extremely easy to use. I’ve provided detailed instructions on how to successfully install Heroku.
###1. Edit the Gemfile###
Heroku runs on a PostgreSQL server (unlike how “sqlite3” is run in the development environment) and this must be updated in the production environment of the Gemfile with the ‘pg’ gem. Update your gem file:
1
2
3
4
group :production do
gem 'pg'
gem 'rails_12factor'
end
Regarding rails_12factor:
“rails_12factor makes your [Rails 4] app compliant with a 12factor provider…” (source)
###2. Run $ bundle install###
This will properly install all the gems and dependencies that are located inside the Gemfile and make them available to the application.
###3. Further production environment edits (recommended)###
Within the file /config/environments/production.rb, make these changes:
1
2
3
4
5
6
#Find these lines and set them to the values below:
config.serve_static_files = true
config.assets.compile = true
#Find this line and uncomment it, just like below:
config.action_dispatch.x_sendfile_header = 'X-Accel-Redirect' # for NGINX
The first set of lines will “allow Heroku to serve and compile static files” like images. Read more about X-Sendfile headers here.
###4. Commit your changes###
Run:
$ git add .
$ git commit -m "Install Heroku"
to update the changes you’ve made so far to the Gemfile and the production.rb files.
###5. The Heroku Toolbelt###
Make a Heroku account if you haven’t done so already. Next, download the Heroku Toolbelt so that you can use the Heroku Command Line Interface (CLI).
###6. Run $ heroku login###
In your terminal, run the command and follow the prompts to login and utilize the heroku command.
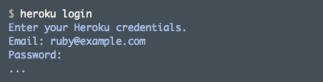
- image courtesy of Heroku
###7. Run $ heroku create from within your project directory###

- image courtesy of Heroku
This will create a new empty project on Heroku and also a git remote that links your app to Heroku.
###8. Run $ git push heroku master###
Push your changes to Heroku.
###9. Run $ heroku run rake db:migrate###
Update the application database on Heroku.
###10. Confirm Heroku has been successfully integrated to your app###
Run $ git remote -v to see that a git remote named heroku exists with the correct url of your app on Heroku.
Troubleshooting: If your git remote points to the wrong app on Heroku, use these commands to update your git remote.
To remove the old remote, run: $ git remote rm heroku
To update the remote, run: $ heroku git:remote -a appname
(In the example above, the appname would be: polar-inlet-4930)